
We are fortunate enough to have a "loft" where the kids have another place to crash.
This room is basically an L shaped room at the top of the last flight of stairs. It's essentially half of the "finished attic" space. (My daughter's room and bathroom make up the other half.)
We have two computer desks, a couple of Ikea chairs that didn't fit anywhere else, an armoire with a TV/DVD player/Wii and two bookshelves in that room. It's the go-to room when Mommy and Daddy kick the kids out of the main floor so that we can have some peace watch our own TV shows and movies.
It's still white walls in there, although I have played around with an alphabet wall on one of the spaces (don't read it... the O is missing!)

I mentioned to my mom that I'd seen some neat photos (in a Pottery Barn catalog) where they put large maps on the wall. Of course, now I can't find that inspiration photo. :(
Anyway, a few months back, my mom brought me three printed maps from long ago.... 70's? 80's?... that came as some promotional thing for a magazine or such.

They are maps from the 1600s mostly, so not something that the kids would use for homework, say, but they looked cool. Unfortunately, as you can see in the photo above, they were all rolled up and wrinkly... and in some cases, ripped.
So, I measured them and then let them sit for several months, trying to figure out what to do.
Then one day as I was bumming around my craft supplies, I saw two identical poster frames... one was brand new, one I'd used to make this (which I no longer used):

Wouldn't you know it... the exact same size I needed for the maps!
So I unrolled the maps, deciding to not worry about the crinkly-ness. I used glue-sticks to hold it to the back board, taping the edges to keep it on.


Here is the one map taped into place. However, when you look closely...

Ooops! Rips and wrinkles.
No Problemo!

I took my Distress Ink and rubbed it across the edges, the corners, and lightly across the top. If you remember from my post on the Ballard plaques, the ink is picked up in any wrinkles, giving the wrinkles a cool distressed finish.
Here's the same photo as above, but distressed... even the rip looks cool when distressed.

Here is the full map, but distressed.

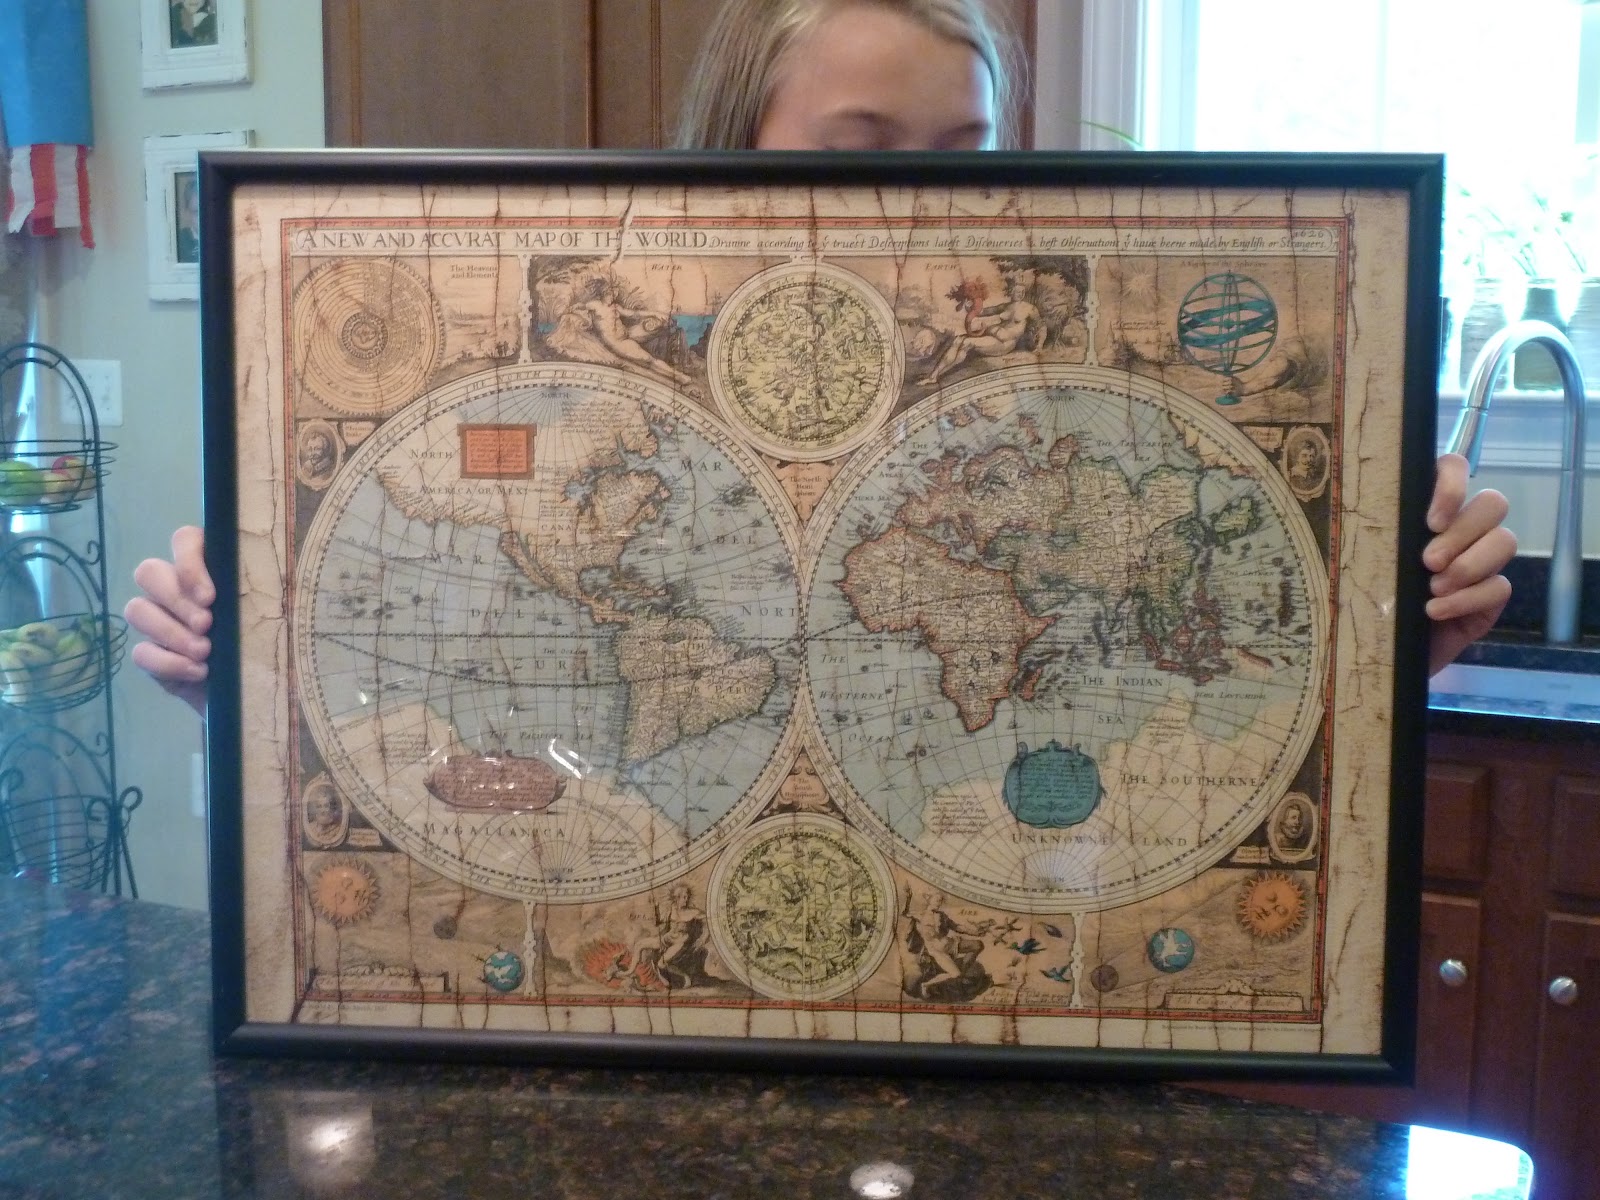
Now, framed.
And here is the other map I also framed. I have one more map, so I may need to swing by Michaels' and hope they still carry the same one. :)

Hmmmm.... now to paint those walls so I can hang up the new distressed maps.
Linked up:

Linked up:
Lovely!
ReplyDeleteLove the look!!
ReplyDeleteThanks for linking up at I Gotta Create!
<3 Christina
Oh I just love these - gorgeous!!!
ReplyDeleteYour newest follower - would love to have
you come by and follow back ( when you have the time )
Hugs,
Suzan