Meet the gang... they look like they'd keep me on my toes, eh?
Friday, February 11, 2011
Wednesday, February 9, 2011
Advice on Chandelier?
Can anyone give me their opinion?
We have simple brushed silver fixtures in our dining room and foyer. I love the simplicity of the silver 5 arm chandelier in this room.
However, I've been wanting some sort of "interest" on the chandelier. Mr. Mike wasn't in agreement, so I just didn't worry about it.
Today, though, I found these chandelier shades at the local thrift store for $3/each. Tan totally goes in this room... no pattern to the shades, but for $3/each, I thought I'd try it.
We have simple brushed silver fixtures in our dining room and foyer. I love the simplicity of the silver 5 arm chandelier in this room.
However, I've been wanting some sort of "interest" on the chandelier. Mr. Mike wasn't in agreement, so I just didn't worry about it.
Today, though, I found these chandelier shades at the local thrift store for $3/each. Tan totally goes in this room... no pattern to the shades, but for $3/each, I thought I'd try it.
As you can see, though, there are these little dangling beads. Cute, but I'm not sure.....
Does this make the room look too frilly now?
Should I ditch them? Hmmmm.....
Sweater Vase
I saw this post on Under the Table and Dreaming a few weeks ago. I thought it looked cute and cozy for a winter table, but I wasn't about to cut up any of my old sweaters. I figured it would be something I'd attempt "one of these days". Well, recently we came across a really cute little sweater that did not fit my daughter.
It's pretty easy to do with just a couple of items.
This could be used for real flowers, but be careful not to allow the water to drench the sweater. :-)
I just picked up a bunch of faux white roses.
It's pretty easy to do with just a couple of items.
Needs:
Vase (any shape could work, but in my case this is a $1 cylindrical vase from the Dollar Tree)
Sleeve from a sweater (in this case, it was a girls cableknit sweater, but most would work)
Hot glue
Ribbons (just bought today on sale at ACMoore for $2.50/roll... cute!)
Total: $3.50 and I still have 2 yards of ribbon left.
Steps (sorry, no step by step photos):
1. Slide the sleeve onto the vase. In my case, I made sure that the sleeve was a few inches longer on each side. At the top I placed the cuff and let it hang over a bit.
2. On the bottom, I trimmed the sweater and pieced it like a pie across the bottom. I used the hot glue to attach the sweater to the bottom. It's important to cut the pieces so that the sweater lays flat on the bottom, or the vase will tilt.
3. I flipped the cuff down and added a ribbon.
I just picked up a bunch of faux white roses.
(See this white urn? I got four of these, and four funky-shaped vases from Wuslu.com recently. I need to figure out what to do with them. Any suggestions?)
Tuesday, February 8, 2011
Labeled Doors
Our house is four-months-old... uh, new. We chose our house out of three possible models from a local builder. We picked this home based on the location and the views (I seriously have called this my "dream neighborhood" for the last four years)... and the fact that they offered a model that fit our family's size and our budget. So, despite doing a little option-picking, our house is still a bit cookie-cutter-ish. But we still love it! Over the years, I've come to realize that I'm not an old house kind of person (though I love the character of old homes). New is easier for me... less serious stuff to go wrong. HA!
One of my favorite things that the builder used in the house are the doors. Nowadays, I think most homes I walked through had the same ol' six-panel builder-grade doors. This builder chose a little differently. Our front door is 8 feet tall and mostly windows.
I love it, but it does mean that whatever we hang on the door, the back of it better look good too! LOL
One of my favorite things that the builder used in the house are the doors. Nowadays, I think most homes I walked through had the same ol' six-panel builder-grade doors. This builder chose a little differently. Our front door is 8 feet tall and mostly windows.
I love it, but it does mean that whatever we hang on the door, the back of it better look good too! LOL
(That's my little pup... my 13 year old, blind-but-sweet Westie, Aspen... that's pretty much all she does these days.)
The interior doors, though, are only three panels. Still hollow and inexpensive, I'm sure, but really cute and different from what I'm used to. In fact, it took me just a few weeks to realize that the middle panels were screaming for labels! I think I finished this project before my clothes were all unpacked. (Yes, the Cricut was one of the first things out of the box!)
Of course, these are completely removable and are made on the Cricut using sticky vinyl. So should I change my mind about being reminded of Laundry every morning when I walk out of my bedroom, I can easily remove them.
(Note... I'm a sucker for home parties: that's a Willow House card holder and Thirty-One picnic tote on the door.) FYI, I did not label EVERY door... only the bedroom level rooms and the Pantry (which is hidden from most traffic).
Rather than use the entire name on the bedroom doors, I used just the first initial monogram. Somewhere in my blog-hopping, I saw someone who numbered their doors. So, I originally thought I'd do the letters instead of numbers... and the full-names of the non-bedroom doors came about later.
Our bedroom mini-doors. Perfect... two doors for two initials.
Now if only we'd done this PRIOR to the movers bringing in our boxes.
Sunday, February 6, 2011
Dining Room... New Color
As I mentioned before, we have a brand new house. Ivory walls throughout. We are slowly, slowly, slowly painting those walls. So far, I've done the Guest Room (lucky parents and in-laws had the nicest room first!) Yep, used the Cricut. I'm not proficient at it yet... took a long time, but it's up!
My daughter's PURPLICIOUS room:
And the Family Room:
(yep, pre-TV)
So, we worked on our Dining Room (before):
And did this today:
Whatcha think?
Valentine Tag Tree and Felt Roses
After seeing so many cool Valentine's mantles and displays, I was inspired to do a little more to our fireplace. As you can see, we have a bit of competition with ... the TV.
So, despite having a stone fireplace, we are limited in what can be placed on our mantle. After all, this is our main "TV viewing" area.
See my Valentine's burlap wreath? I threw a burlap strip around one of my candlesticks... but that was it. Only a hint of red.
So, I took that copper vase on the hearth and decided to dress up the grasses inside. All of the faux grasses in the vase are from the Dollar Tree or from HomeGoods' clearance aisle.
Here's the vase.
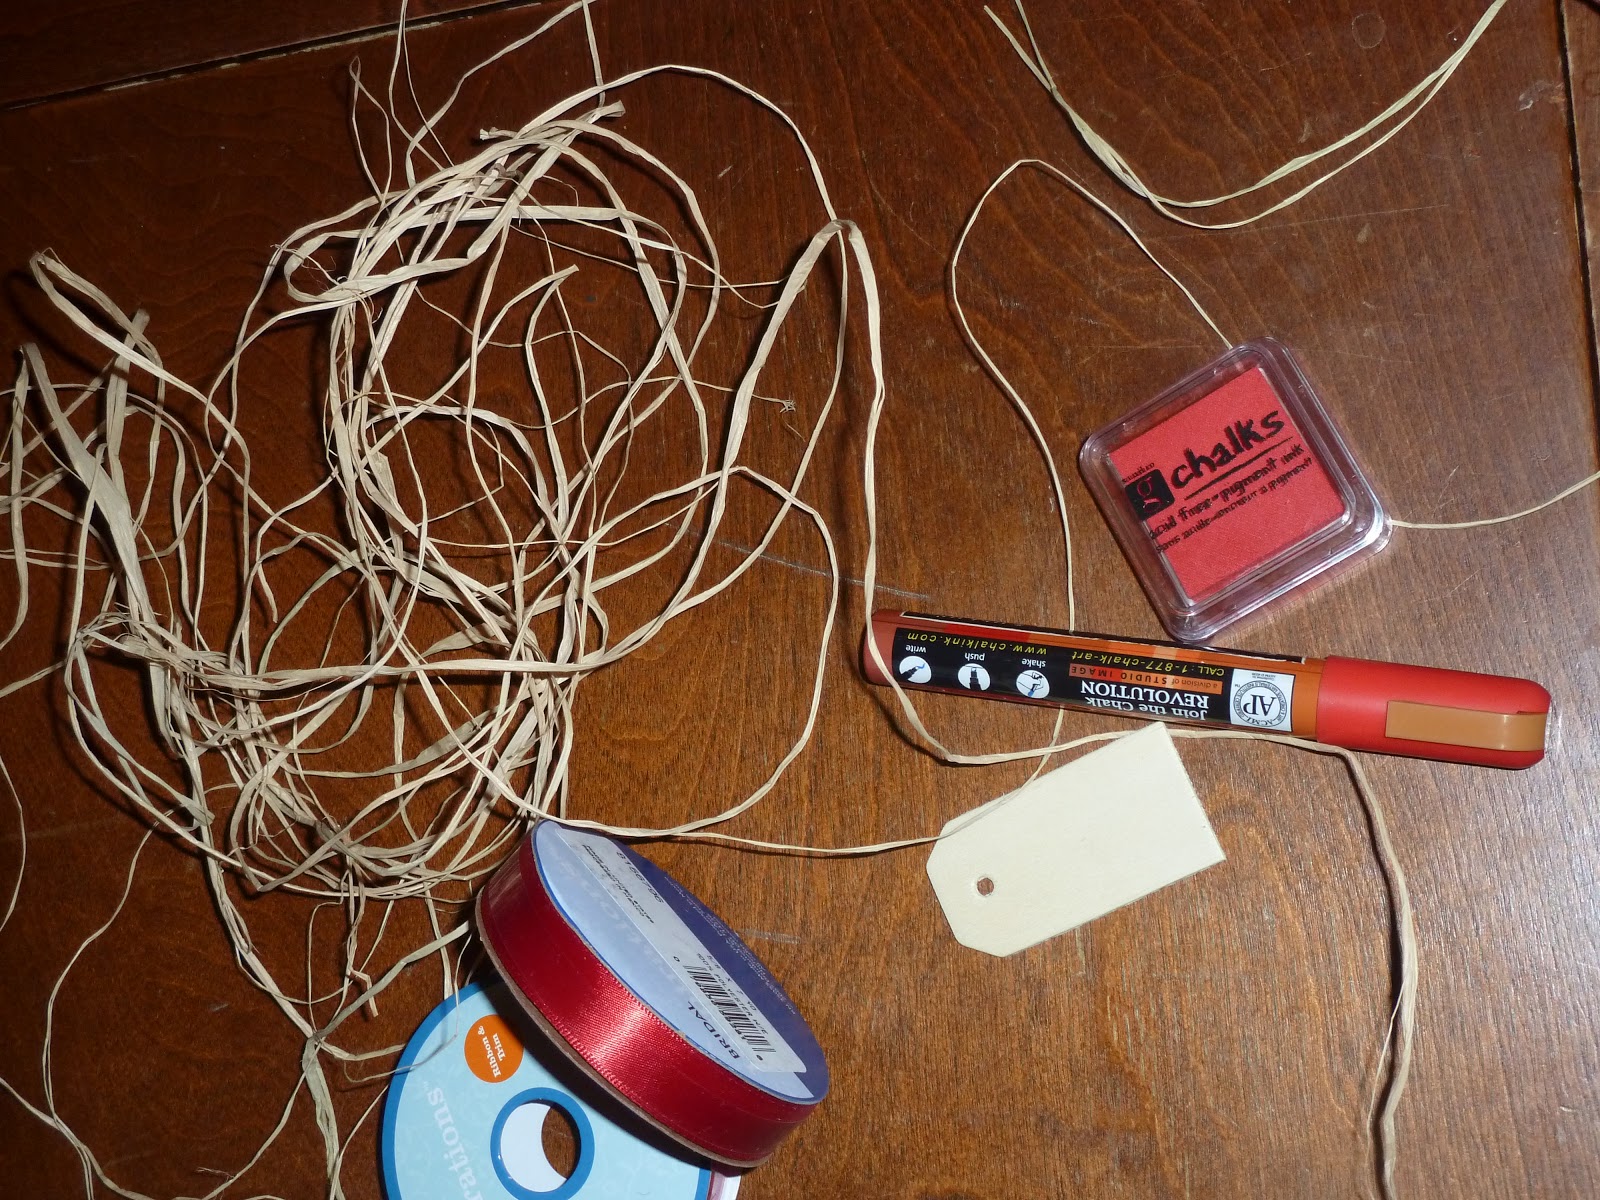
Here are the supplies I scrounged up from our basement pile.
Needs:
Raffia straw
Wooden tags
Chalks inkpad
Red chalk pen
Red satin ribbon (50 cents... ACMoore even had it on clearance two weeks before Valentine's Day)
Red sheer ribbon (ditto on the clearance, but this was only 25 cents!)
Steps:
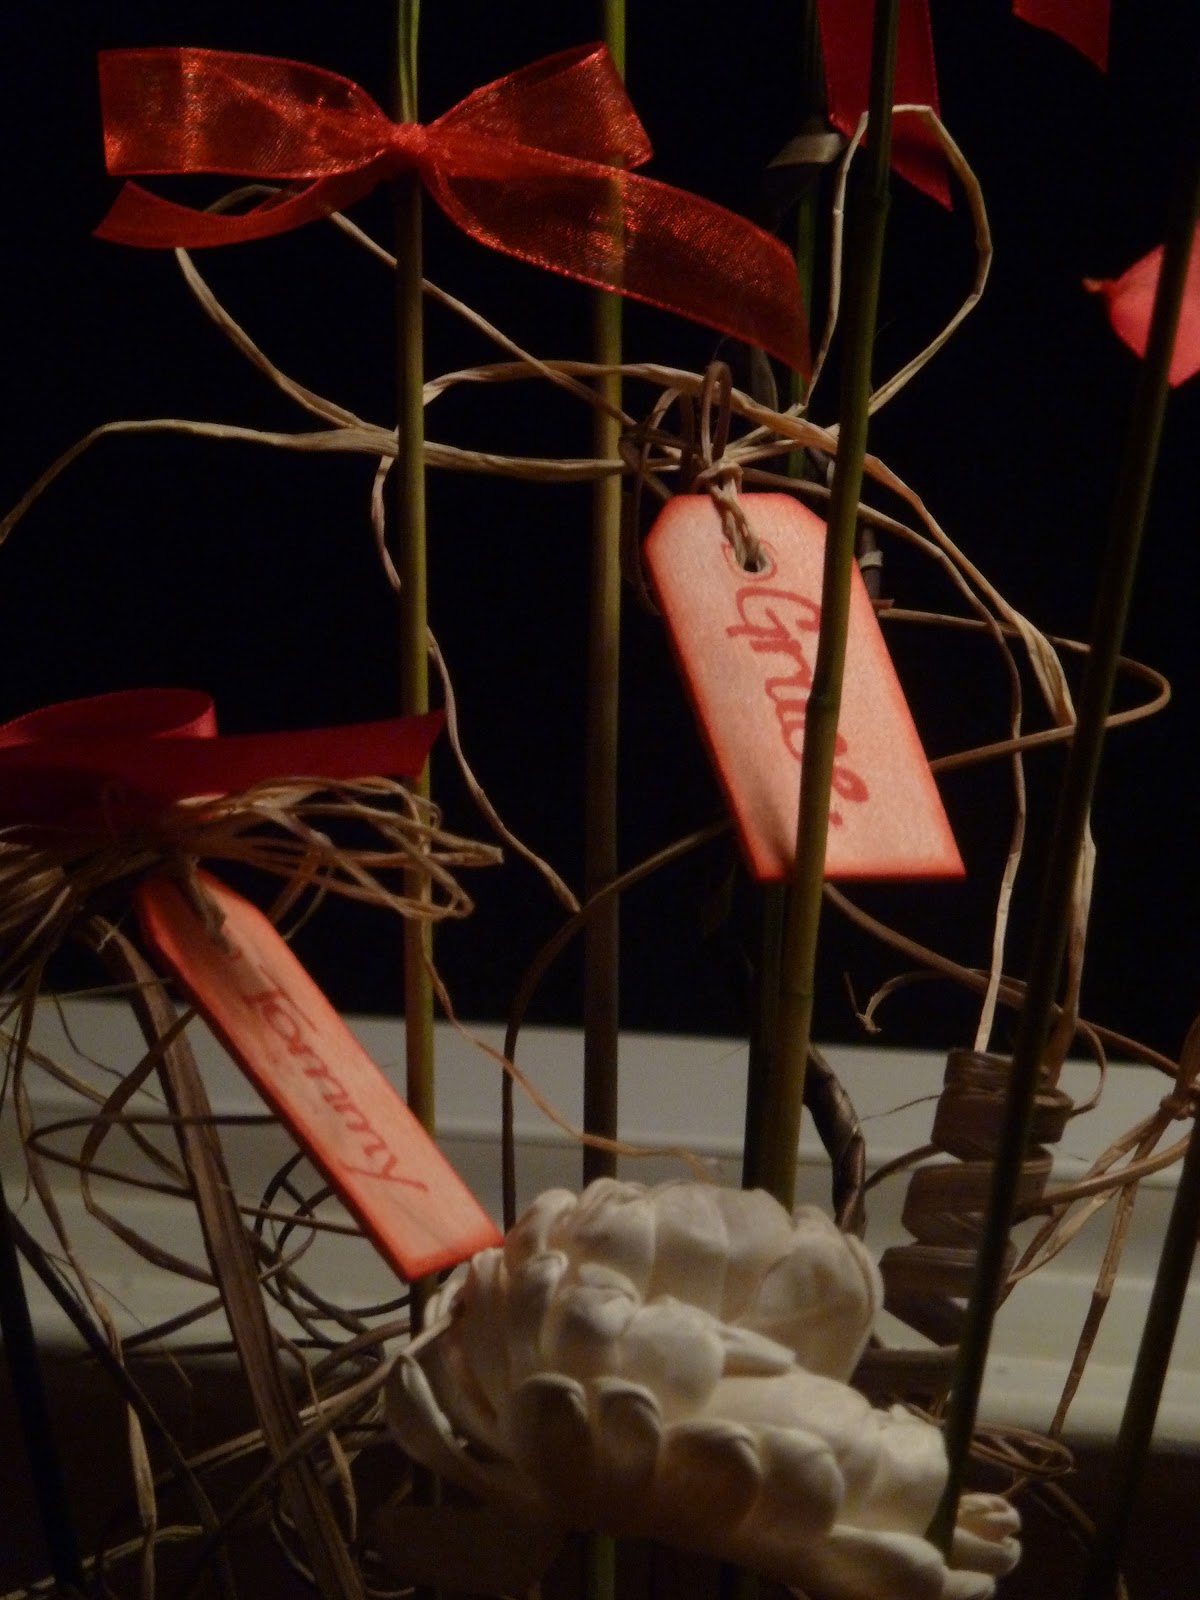
1. Rather than use paint, I took the chalk inkpad and gently rubbed it onto the wooden tags to give a slight color to them.
2. Then I used the Chalk Pen to write my favorite Valentine names on them. I added a little raffia.
3. I tied them onto the grasses
Added a few little ribbon bows....
And Wah-lah!
Then, after seeing that I still needed a touch of red to the upper left portion of my hearth, I set out to find some red flowers to put into my plain white vase.
(BTW, this is my $3 find at the thrift store when I was staging my previous home.)
I searched and searched and couldn't find anything red in my house. So, I set out to make my own. I found these:
Needs:
Red felt (this is patterned felt)
small dowel rods
hot glue gun
Steps:
1. First I stretched the one side of the felt a bit to sort of ruffle the edges.
2. Then I used the glue gun to roll up the felt, and kept tucking in the bottom to make this:
I hot glued the fake rose to the dowel, and added a little raffia to make some bows.
3. I figured the vase needed a little more, so I found this little chalkboard.
Added a little Chalk Pen, hot glued a loop of red satin ribbon,
wrapped it around the vase, and got:
So, here's my Valentines fireplace.
Hope you enjoyed the photos.
Enjoy the big game Sunday night! (Go Black and Gold!)
I linked up at this linky party at Thrifty Decor Chick.
Wednesday, February 2, 2011
Valentine's Burlap Wreath Tutorial
After browsing a few dozen Ballard Designs catalogs over the years, I have fallen in love with burlap. So easy, so simple-looking yet so elegant, so inexpensive, and most importantly... so NO-SEW! :-)
My Christmas tree had burlap wrapped around the base instead of a tree skirt. ($15 for several yards, as opposed to $80+ for the tree skirt at Ballards... who cares that it looked like a Linus Blanket tree skirt.) It is so hard to see from this photo, but I also cut burlap into 6" sections and wrapped it around the tree instead of garland or ribbon. (Excuse the photo... this was taken long before I realized I'd want to include the photo on a blog! In fact, this was before we filled that huge hole above the fireplace with a TV... sorry for exposing our barenaked cables!)
So, I've been intrigued by any burlap projects out there. Anything that looks natural, yet pulled-together... and best of all, requires no sewing! When I saw all the burlap wreaths out on the blogosphere, I knew I'd have to do one.
My Christmas tree had burlap wrapped around the base instead of a tree skirt. ($15 for several yards, as opposed to $80+ for the tree skirt at Ballards... who cares that it looked like a Linus Blanket tree skirt.) It is so hard to see from this photo, but I also cut burlap into 6" sections and wrapped it around the tree instead of garland or ribbon. (Excuse the photo... this was taken long before I realized I'd want to include the photo on a blog! In fact, this was before we filled that huge hole above the fireplace with a TV... sorry for exposing our barenaked cables!)
So, I've been intrigued by any burlap projects out there. Anything that looks natural, yet pulled-together... and best of all, requires no sewing! When I saw all the burlap wreaths out on the blogosphere, I knew I'd have to do one.
Here are a few of my favorites.
This one came from Tatertots and Jello... SO colorful and cheerful. I love the little clothespin line to change out letters. Mini clothespins are AWESOME! (I use clothespins for my chip bags and cereal bag-inserts, for my preschool class for funky graphs, for my mitten Advent calendar, and so much more...)
This is from Where the Heart Is I love the ruffly look of the burlap, and who doesn't adore gingham ribbon?
This is from WhipperBerry. Gotta admit it... this is the blog that sold me on making my own. As you'll see below, I did something quite similar. Beautiful red color! I had no idea you could get burlap in such gorgeous colors till I saw this!
Well, when it came time for doing my own, I wasn't sure what I was planning. I wanted a red wreath, like the one from WhipperBerry, but I wasn't game on cutting lots of circles (I may be ambitious, but there's definitely an element of LAZY to me, too.) I simply used what I had easily on hand that night. This is what I ended up with.
Needs:
A wire-ring wreath form (the kind you get in the floral section with four rings, connected)
Red burlap (cut into 1"x8", approximately)
Natural burlap
Steps:
1. Never once did I measure anything. I simply cut strips that looked "about right". Maybe 3/4"-1" wide and about 8"-10" long. You will need a lot, but just keep cutting throughout the project till you think it's filled up.
2. Wrap each piece around one wire. I tried to do a shortcut and wrap around two rings at once, but it required longer strips, and didn't look as full. So, I tied knots around single rings.
3. Keep tying pieces onto the wire rings till the wire is completely covered. Doing it this way will result in shedding and some stray pieces. I think it adds to the charm. If you look closely, you'll see some strands sticking out all around.
4. Cut out any shapes you'd like to attach. On mine, I cut out a long strip of natural burlap and made a bow with it, and then I cut out a heart.
5. Attach the pieces with safety pins (to be easily removed later if I want to use this for Fourth of July or Christmas).
Wah-lah!
My problem was deciding where to put it....
On the hearth?
On the armoire?
On the side table?
On the mantle?
It wound up staying on the mantle. It gives a little personality to the mantle (which is sometimes overshadowed by the TV above). Nice and bright addition.
Yay! Ready for Valentine's Day!
Subscribe to:
Posts (Atom)


![beforeAndAfterButton[2].gif](webkit-fake-url://EFFD6C85-01AE-4571-AEB5-48C43C2D0A5C/beforeAndAfterButton%5B2%5D.gif)