Saturday, March 5, 2011

Our Leprechaun Trap!

My kindergarten daughter came home with this month's family project for March... to make a leprechaun trap.  I had no idea what that meant, so after a little Googling, I found some cute ideas.


Here's what we came up with.


The idea?  We trick the leprechaun to go up the ladder to find his shiny treasure, he falls through the top, and he's stuck!

Here's what we used:
Old oatmeal box (I KNEW I'd find a use for it!)
A plate (to trace the rim)
Green felt for wrapping the box
Light green felt for making a few shamrocks
Stiff felt for the rim
Black duct tape (for the hat-belt)
Yellow felt (for the buckle)
Dowels (for the ladder)
Stick pieces (for the steps)
Hot glue
Skewer (for the sign)
Green paper for the flimsy hat top
Mini gold glass marbles
Trace the plate onto the stiff felt to make the base.

Wrap the oatmeal can with the felt (use hot glue).

Tuck the excess where the cylinder box bottom is.

Glue the oatmeal box to the stiff green base.

Cut out the middle of the hat lid.

See... it fits back on and will make the "trap"!

Use the black duct (Duck) tape.
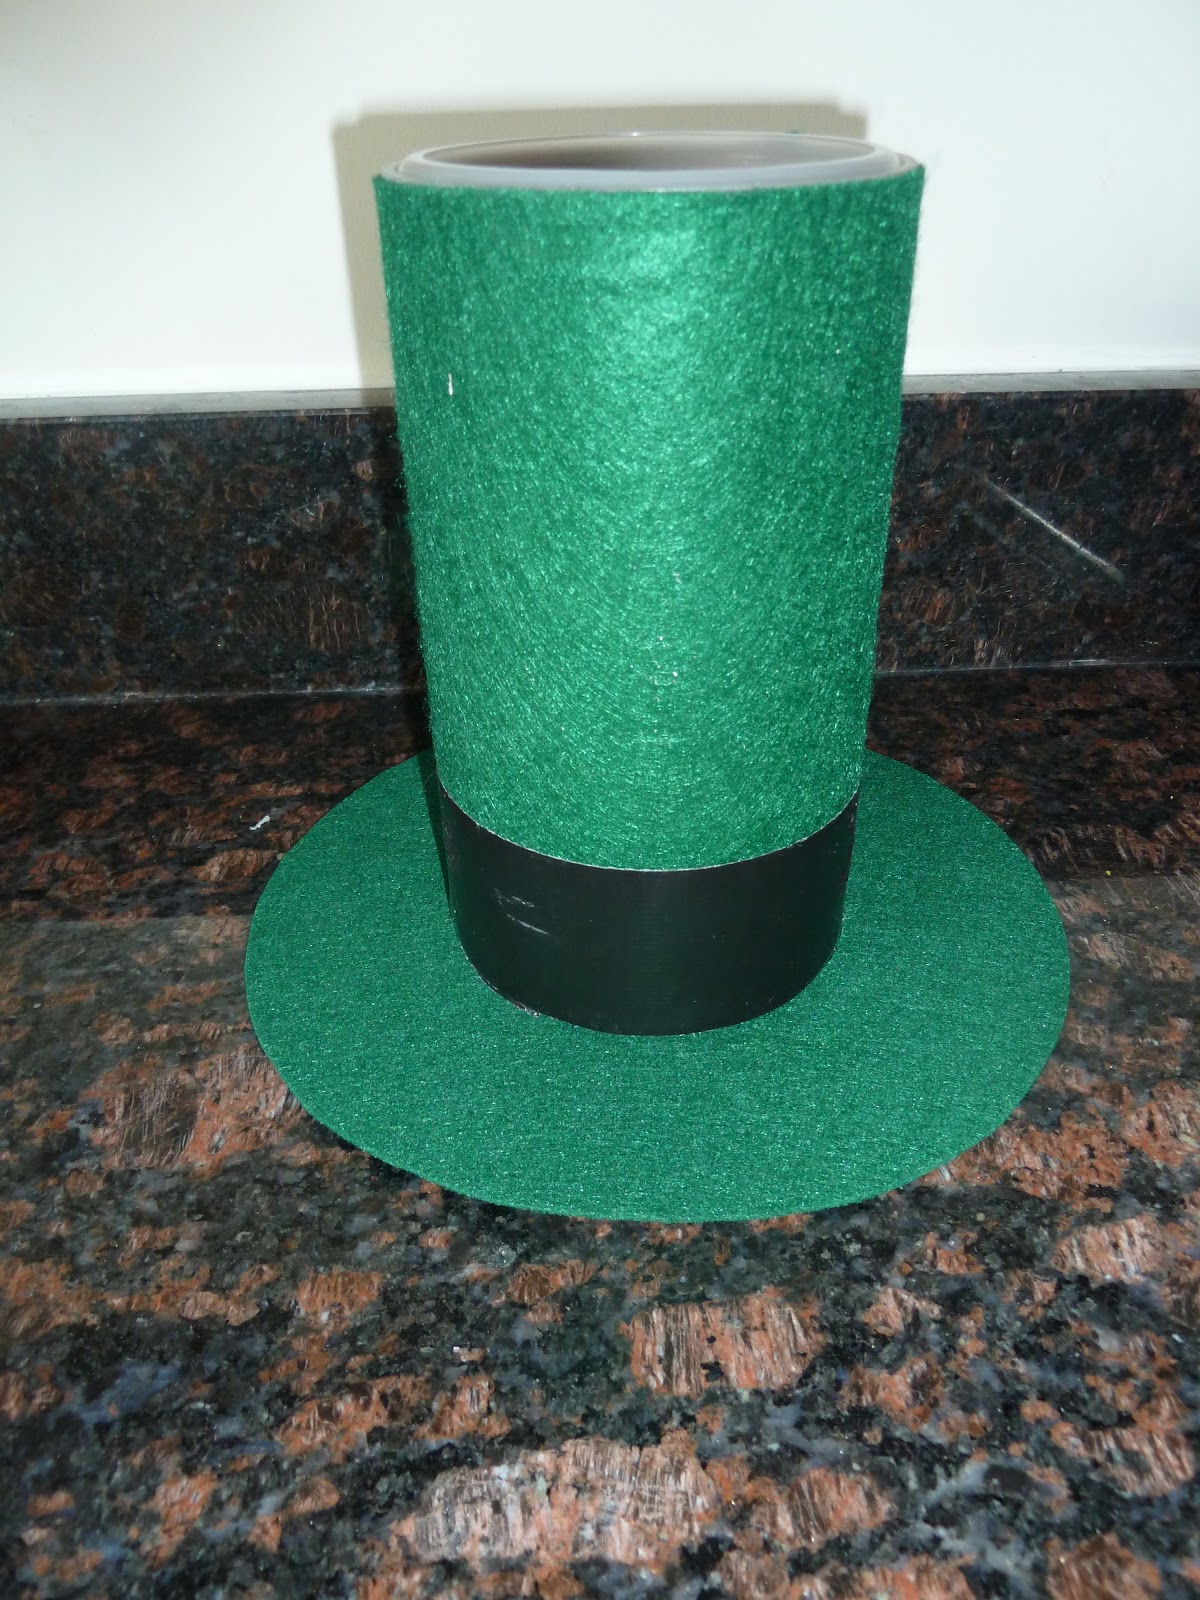
Looks like a leprechaun hat, eh?

Here are the tiny glass marbles we used.  I found this on Michael's clearance just yesterday for 99 cents for both little bottles!  I used half of one bottle (with lots of 'em escaping over my counter and floor, too!)

My daughter helped now that the hot glue wasn't used as often.  She spread the glue stick on the paper so we could sprinkle on the gold.  (This was round two...)

Then, she helped sprinkle the gold marbles.  We need to make the top as eye-catching as possible to attract that pesky leprechaun and make him step onto the hat.

She pressed it into place.  Notice the tear in the top.  I hope it's not too visible for Mr. Leprechaun.  It's causing the hat top to be weaker yet.  (BTW, the little green shamrocks were glued on earlier... forgot to photograph that).

Next, we made the ladder.  I had two precut dowels and just added a few broken twigs to make the ladder with hot glue.

My daughter made the sign.  You know those devilish little leprechauns never do what they are told... gotta remind him that it's shiny up there, though!

Then we left a little trail of gold going from the sign up the ladder.

The gold trail.

Ha ha!  Our leprechaun trap!  We'll get him this year!  (Or maybe he's too wise to get trapped?)

Friday, March 4, 2011

Dressing Up a Candle Cup

Isn't that cute... the title rhymes.  :)  Hey, after a week of Dr. Seuss-ing it, rhyming is in mind.  Oh, and why not... isn't this just the cutest thing?


Today I aimed for a simple project since I had to squeeze it in between kids' activities and shopping.  I love the look of rope/sisal/twine/burlap/etc wrapped glassware.  So far, however, I wasn't up to working on a large project.  So instead, I used this...
I found this little sweetie at (where else??) a thrift store for 99 cents.  Love the little handle!

I could have painted it, or Mod-Podged the outside, or etched the glass, but I wanted something a little natural and neutral.  

So I added this:
Glass and sisal (and hot glue, of course).

Basically, I started with a strip of hot glue around the base of the cup and stretched the rope around the cup.  I'd add a little glue here and there as I inched my way up the glass.  It probably wasn't the neatest job in the world, but fortunately hot glue is forgiving.  It peels off of glass when necessary... and the little strands and globs were picked off later, when the project was finished.

The newly-sisaled cup looked a little bare, so I dressed her up with some leftover ribbons...

and added a candle.

She was definitely cute as is, but after hitting Michael's this evening with my daughter, we found a few accessories.  


Ahhh.... NOW it's complete.


Wednesday, March 2, 2011

Our Bookroom

I know, I know... the title.  What is a "bookroom"?  Well, it's a name that has stuck with our family for almost a decade.  In our last house, we had a front dining room that was never used as a dining room.  It evolved from an empty room, to a room full of boxes of books to a sitting room of sorts (mini living room?)  Well, way back when the books were in the room, before we ever got them placed into bookshelves, we referred to the room as the "bookroom".  The name stuck, especially since it made complete sense to a two-year-old and a four-year-old... the room with the books.


Now, eight years and a new house later, we still cannot refer to that front room as "den" or "sitting room" or "library" or even "living room".  Nope... it's our bookroom.  What about the books, you say?  Ha!  Don't you see my daughter's book on the ottoman?  (That's the only book in the room at the present moment.)


This room is not by any means done... but it's still my favorite spot!  I picked those pillows up from a yard sale (... on the day we moved our stuff into storage... great timing!)  From there, I fell in love with the black and white, so I went with it.  The ottoman, lamps and mirror came from Home Goods.  (oh... it's such a good thing that it's 35 minutes away or I'd be permanently broke).  


That Ikea loveseat has been with us for years now.  As you can tell by the permanently squished back cushions, it's a favorite of my Westie.  She just lays on top of the cushion.

So... the question now is... what do I paint this room?  We are leaning toward all neutral walls... tans, browns, offwhites, grays,...  with the goal being that accessories add the punch of color.  Directly across from this room is the dining room (and it's an open space).
Should we stick with the same brown color?  BTW, see the chandelier?  I took the beads off of the shades.  Any better?


Speaking of using accessories for color punches, here is our St. Patty's display in the bookroom so far.  See those little candleholders I made?  I swapped out the candles for green ones.  The urn is from Wuslu.  The pedestal cloches were a recent find in a local store going out of business.  (How gorgeous they are!!)   The "Irish" sign and wreath holder were also found at that same 50% off sale.
Wouldn't that apple green color just POP against a brown background?  :-)

Speaking of popping, don't these flowers look amazing against the brown?


Tuesday, March 1, 2011

Cabinet Door Family Sign


Well, the mudroom is slowly coming along... and is also becoming the fanciest room in the house.  LOL  How did that happen?

I own almost nothing from Ballard Designs (aka Ballard De$$$$igns)... but that little floor mat is from that catalog-of-inspiration.  I guess a $19 rug is acceptable considering the cost of most items in that catalog!!  Geesh... those prices are not for the faint of heart.

It's hard to see in that photo, but do you notice how one door stop seems a little bigger (the one on the right)?  It's a magnetic one.  There is a metal circle on the door that will catch the magnet and keep our spring-loaded garage door open for grocery unloading.  So simple, but pure genius.  THANK you to whomever created that little invention.

 It's so rewarding to work in small spaces... they look more complete faster!  I painted the "hall" last weekend with a "Ooops!" paint color I found for $5.00 at Home Depot.  Surprisingly it was identical to one of the swatches of paint I was holding in my hand when I decided to take a look at the mistake colors... just in case.  I was worried that this color was going to look too dark, but I think it looks pretty neat against the off-white doors and trim.  The computers may not show it well, but the color is a sort of dark mushroomy taupey-charcoal grey.  

Like the newest addition to that wall?  The impromptu burlap white board is gone. 

For those of you on Facebook with me, you know I've been going crazy looking for cabinet doors.  After seeing so many great posts on a favorite blog I enjoy reading, The Little Brown House, I was inspired to make my own sign.  Here is Sharyl's sign.


Unfortunately our local Restore stopped carrying cabinet doors since they were not big sellers.  (I hinted greatly that one particular customer would buy a few!)  Unwilling to give up, I took a little longer drive to the next closest Restore... and wah-lah... TONS of cabinet doors!  Woo hoo!  They were technically $3 a piece.  However, I got three for $5.25.  Not bad.

Here is what I did with that simple maple (?) cabinet. 
It fit perfectly inside a frame we've had for awhile.  The larger frame used to house a thin layer of cork and we just weren't using it.  So, I spray painted both pieces (frame and door) with Heirloom White paint.  Then I pulled out my trusty Cricut and added a little family pride to our mudroom.  

Mr. Mike had a great idea.  He wants me to get more doors, paint them, and do various themes:  Christmas greeting, Easter greeting, Birthday greeting, etc. and make this a changeable piece of decor.  He may be onto something....

Confession time...

I'm not always super thrifty.  For example, I am totally crushing on four Garden District mirrors from Ballard De$igns for my dining room.  I am in LOVE with them!!  Unfortunately I've been dying for them for months now... and this month they are on sale (20% off).  Something tells me, I'm going to cave and actually buy them.  Yikes!  Wallet, you're about to take a beating.  Kids, you're going to love me... ramen noodles for all this month!  

So, since I just revealed my secret expensive tastes, I will also take a moment to brag about the thriftiness in the photo above.  That little bit of decor has cost me $41 so far:
$5 paint on walls (HomeDepot)
$5 spray paint for sign/frame (AC Moore)
$3 frame (yard sale, long ago)
$1.75 cabinet door (Restore)
$2 chalkboard (Salvation Army)
$3 chalkboard paint (for renewing, AC Moore)
$2 clipboard
$19 floor rug

Still have plans for more in that room... but I've gotta wait till the weather improves to do some of the work outdoors.  Stay tuned...


www.mommaskindacrafty.blogspot.com.png

Monday, February 28, 2011

What To Do With Corks and Old Books {Tassels!}

Oh my!  I never thought I'd take a week off from blogging when so many things are also running through my mind.  Unfortunately life happens.  

I am a preschool teacher two days a week, but also plan activities for a third day every week.  On top of that, I organize the supplies for crafts for our church's Sunday School program.  It sounds like it shouldn't be a big commitment, huh?  Give someone like me the spring lesson books with 26 craft lessons, 2 classrooms each... and I spend several straight days trying to buy, cut, write verses, etc.... all at once... to get it all ready by the following Sunday.  Call me OCD, but it drives me nuts to have things only partially done.  However... it's now done and won't need any thought till June.  :-)  Just in time for VBS Preschool directing to kick in.... (yes, I am slowly learning to say "no"... but for later projects...)

Oh, and I'm a mom of four.

I missed blogging!!!  It was driving me bonkers that I couldn't get online to blog.  

But alas... I'm back!

Today, I decided to tackle a project I've been wanting to do for awhile.  Tassel-making.  Now, I'd love to be able to sit down and make gorgeous FANCY tassels with pretty figurines, expensive fringes, and beautiful ribbons.  However, until those costly items show up in a local yard sale or thrift store, I'm upcycling a few things sitting around the house for now.  

Last weekend, I grabbed a bag of corks from Freecycle (have you ever used Freecycle?  I LoooooVE it!)  Yes, we drink wine.  Yes, I *should* have a huge bag of my own corks by this time in my life... however, we destroy corks.  Call me a novice de-corker.  I rip 'em to shreds every time.  

(If anyone knows how to remove them easily and without ruining them, let me know!)

A few months ago, I grabbed a few old books at the thrift store that appealed to me:  a worn-out Bible Story book (not a Bible... don't know what the protocol on that is, but decided it wasn't worth having to explain myself later...this is just a story book for kids and liked the idea of seeing Biblical names in my book-page projects later) and a Children's dictionary. 

So, together I put those items along with a few ribbons, wire and trinkets I found in the craft closet.

Needs:
Old book pages (cut into a fringe)
Ribbons
Wire
Hot Glue
Beads/Ink/Stamps/Clothespins/Etc

Steps:
1.  First take a few pages of fringed book pages and roll into a tassel.  Secure with wire.  Hot glue to the bottom of a cork.
2.  Begin to add more pages to the wired section and then begin glue ribbons around the cork.  In my case, I formed loops with the ribbon to make it all a little puffier.

3.  Layered a few more pages and ribbons


Then to cover up the ugly hot glue mess and ribbon/paper edges, I wrapped some thinner ribbon and some sisal rope around the top.


4.  Then, I decided to give this a little charm with some personal interest.  I used a mini clothespin and stamped it with our anniversary date.  Then I strung a mini chain of some Chinese character beads to give the tassel a little embellishment.  (We have an adopted Chinese daughter and have been to China.)


5.  I hot glued a little loop of wire into the hole already in the cork, strung a pretty taffeta ribbon through it and ...


What do you do with a tassel?  What can't you do??


I made another one with a few other goodies... but same colors.


Oh... I love to re-use old stuff!