Monday, June 18, 2012

Ahhhh.... Vacation!

The kids' last day of school was June 8 this year (usually it's a week later), so we packed our bags and headed out bright and early on the 9th (6am, I believe)!  We began our ten hour drive and, thus, our cool vacation!

We realized at some point this spring that our youngest daughter Gracelynn has never seen the beach.  She's been home with us for over four years now!  So, it was five years ago that we last ventured to the beach.  It was time.  :)

When our family wants to hit the beach, it's usually Corolla, NC (OBX).  However, I personally have been dying to go to Charleston, SC.  So, I convinced Mike to head to a beach down in SC instead.  We stayed at the Isle of Palms beach in SC... just a 20 minute drive to Charleston.

Here's the fam heading down the access to the beach on our first full day there.

This is Grace's first time EVER in the surf.  Oh, to have those skinny little legs and skin that darkens in, oh, about 10 minutes!!

While we were in SC, we decided to stop at Patriot's Point one afternoon.  It's consists of a few naval ships, including the USS Yorktown, an aircraft carrier.  It was a lot of fun to go exploring through the carrier and to climb on various equipment. 

Pretending to fly.

Um... wow.  I joked that I should make this for my husband's next family reunion!

Of course, I would need one of these... a mixer taller than me!

Here my son Ben and Mike are pretending to get the day's flight plans. 

Gunman Grace.

The next day, we ventured into historic Charleston and went on a cool walking tour!  I recommend popping into the Brass Pirate (on Market Street in the Rainbow Market behind a pizza restaurant.)  For $30 ($45 for six of us), you can get a bag that includes a cool Pirate scavenger hunt that has you trekking all over the historic parts of Charleston.  We saw about a half dozen old graveyards, including this one that included several markers with the Jolly Roger on them!  Pirate graves!  Ahoy!

The tour also took us down some cobblestone streets, looking at old churches, reading Civil War and Revolutionary War markers and reading about the pirates captured in Charleston.  Too bad it rained most of the time... we basically started running from one awning to the next!  But, avast my hardies, we still found some cool treasures!  Argh!  After answering some 25+ questions, we were rewarded with a cool pirate prize back at the shop.


In Charleston, we stopped at the City Market and tried some yummy pecan pralines and bought some tees and jewelry... and even grabbed a cute HairWrap for Grace.  
This picture was taken in SouthEnd Brewery... great fire-oven pizza.  :)

On our tour, my husband stopped me at one point and said, "Chris... look at the houses!"  Aha!  Rainbow Row!!!

Our old college friend lives in Charleston and had some yummy local restaurant suggestions (beyond the same ol' Hymans and such that you'd find in Southern Living....)

We went to RB's in Shem Creek for some good local seafood.  Yum-Oh!  

One spot that HAD to be tried... twice!... was Charleston's Cafe off of Johnnie Dodd's Blvd.  Just in a little shopping center, but it had the most amazing breakfasts!!!  

HIGHLY recommend the pancakes.  :)

A few days later, when it was a bit gloomy and overcast, we decided to forego a whole day at the beach and took the afternoon to visit Magnolia Plantation.  Too cool!
It boasts the country's oldest garden (planted back in the mid 1600s).  And the whole plantation was filled with these OLD oak trees, just dripping with moss.  That tree is just too cool!!

That's a BIG tree!

And that's a lot of moss!
(Doesn't he look thrilled?)

Even in SC, we found my hometown represented... Steel City Pizza.  Had all sorts of Pittsburgh signs and even a Kennywood sign 

(ten points to anyone that knows what that is!)

Another good breakfast spot down on Isle of Palms.  Watch out though... moments after this shot, we all got eaten alive as we walked through a SWARM of mosquitoes on our way to the car.  Dang things even flew in after us.  We killed no less than 8 mosquitoes in the car alone!  Ouch!

We weren't sure we'd be able to spend Father's Day truly celebrating, since we had plans to take our son to camp that day.  So, instead, the kids and I surprised Daddy with a Tie-Banner (Pinterest anyone?) and some fun little MadLibs about dads.  


I like that my older kids can take photos now too!

We saw a lot of Palmettos around (and one Palmetto bug only, thank goodness)... especially on cars and tees and flags (it's the SC flag).  Had to get the little vinyl decal for our car, of course.

Mike said that someone once gave him a bit of advice... always get a picture of your family enjoying themselves on the beach... so he snapped this photo.  Thirty-One came with us to the beach house and to the beach, of course!

Our last trek back to the beach house.  So sad.

I made it my goal to eat some true southern food.  At Pages' Okra Grill, I had me some PICKLED OKRA!  

Oh yeah!  
Had some collard greens and fried okra, too.

This is the lighthouse on Sullivan's Island (please forgive the poor camera-phone photo taken while driving).  I had to get this shot.  We affectionately referred to this lighthouse as "Ferb".  :)  Tee hee.

Alas, our trip had to end.  But I guarantee we will be back someday.  Charleston's charm rubbed off on us and is beckoning us back one day.  Love that town!  
Bless its little heart.

Tuesday, May 15, 2012

Stenciled Wall

Our family room is beginning to come together.  I stuck with a very neutral palette... brown sofa, brown and black tables, gray and tan stone fireplace, tan walls, cream curtains, wood floors, etc.  I've tried to add a little green and orange in the pillows and accessories.  

And in fact, if you look around our main floor, it's mostly neutrals:
{looking from family room into kitchen w/no breakfast room furniture}

{bookroom/frontroom}

{dining room}


So to add a little splash of color without going too bold, I decided to paint one of the walls you can see from the family room.  It's about 6 steps down the staircase as you make your way down to the basement.  

First I painted it Behr "Pear Cider".

Then I created a stencil out of an old cereal box.  I personally love the "Moroccan trellis" sort of design.  Originally I wanted curtains with this, but ended up with cheaper "henna" design from Target instead.
Then I began tracing the stencil all over the wall.
I just used a pencil, but that sort of dictated a darker color then.  (Originally I was thinking of painting with a creamy tan.)

I found some leftover charcoal gray paint from our little office nook.

I used a very thin paintbrush from one of those $4.99 packs at Hobby Lobby.
And I began following the pencil lines carefully.  As you can see above, they are not "perfect".  But wait till you see the final product.

And I kept on going....

And going....

And six hours later (yes, six long hours with a few snack and water breaks)....

I now have my punchy orangey patterned wall.  

If you don't want to spend 6 hours doing a 6'x6' wall, then I suggest making a larger pattern.  :)

As you can see, those variations in painting are not noticeable at all after backing up a bit.  

I love it....

Hmmmm..... now to decide WHAT to put on this pattern!!??  

A mirror?

Solid plaques (aka charger-style?)

An empty frame with a simple wreath?

Any ideas?


Monday, May 14, 2012

Grab-n-Go Milk

Recently on Pinterest, I've seen people use Starbuck's glass bottles as recycled drink glasses... 


as fancy drinks for Baby Showers:

or Kids' Birthday Parties:


And although all of these are adorable for parties, it made me realize how I can use this idea on an everyday basis.

I have one serious milk drinker in our family:
This is my boy Tommy (on his Baptism day on New Years Day).

I wish the other kids would drink milk, but they never really took to it.  Tommy, on the other hand, almost exclusively drinks milk.  
The problem with this is more a logistical issue.  We teach our kids to get their own snacks and drinks throughout the day (although I must admit, I need to intervene when they choose a few too many junky treats).  However, as strong as this little guy appears, a full gallon of milk is always too tricky for him.

So, typically Tommy's drink-pouring-responsibility falls on Mike and I.  I decided, though, to make some use of the Starbucks bottles I had.

I now use them to pour a few glasses each day.
Despite wanting to "dress up" the bottle, I utilize our dishwasher daily!  I was afraid that any painting of the lids or bottle would simply wash off quickly.  Maybe I'll look into permanent glass paint at some point.  

I drew the black Sharpie line on each bottle so that we can eyeball the bottle and know if Tommy used the bottle or not, and know which one to open next.  He can always take a few sips and return the bottle to the fridge since it has a lid.  

It is glass, so I worried about dropping and breaking, but quite truthfully he is eight years old now and is pretty good about handling glass.  He drinks from glasses at our meals each day.

This could easily be used for other drinks too... if you buy gallon sizes of OJ or lemonade or anything else, these little things are a great way for the kids to just grab and go... {without bugging Mom and Dad to pour another drink}.


Friday, April 20, 2012

New Rug {finally}

Our front room, dubbed "the Book Room", is one of my favorite rooms of the house.  It's not entirely quiet since our house is very open... but it's great for reading and getting away for a little relaxation without being surrounded by DS sounds, hyper kids and loud kid's TV shows.  It's also my tan & black room.  I loved the way it looked... but it was missing something.  A rug.

Why?
This little bugger came into our life... ironically the same day I painted the Book Room.  :)

Lucy is a sweetheart, but was a stinker when it came to house training!  There was no way I was risking buying a rug only to toss it in the trash.  I lost our 8x10 shag rug in the family room due to this little bugger.  By the time I realized just where the stink was coming from, it was way too late.  Funny... shag rugs are fun to walk on, but "liquids" sink to the bottom and aren't easily seen!  It took us a long while to figure out that she'd been using our rug as her personal bathroom for weeks.

Well, a year later, I think we have it all worked out.  She's much better now, and rarely goes into that front room.

So, I took the plunge (cheap plunge) and bought a rug from Overstock.
It's an indoor/outdoor rug, but I wasn't looking for plush.  I wanted something with tan and black.  But most importantly, I needed CHEAP.  :)

Here's a brighter photo.

Our little dog, Aspen, died a month ago.  She was my first kid... 14.5 years old!  So, when she was gone, we removed the adorable "doggie throne" (first photo) since Lucy is too big for it.  I replaced it with a simple black chair.

This was a $2 yard sale find, spray-painted glossy black.  It goes well with my $2 yard-sale vase.  Not sure how much we'll use that chair, but it replaced the other chair just fine.

Oh! And we've had that rug for about a month now.  And no surprises!  YAY!  I'll still wait a little before we get the replacement shag rug... 8x10 is a little more expensive... and I really don't want to trash yet another one.  


Thursday, April 19, 2012

Breakfast Room Update

We have a door to nowhere, as many new-home owners may have.  You know the one... the pretty sliding doors that look out into the backyard... with the big ugly white gate stretched across it since the door is a story above ground!

We have no deck or stairs or anything outside that door... yet.  {should've bought a Mega-millions ticket... I KNOW I would've been a winner.}
Here is a shot of the doors when I hung up 40th birthday cards for my husband.  Those are simple brown curtains... nothing fancy.  Sort of "blah".  

So, rather than let that door sit there, bare, we have dressed it up a bit since it's on a big open wall.
After we painted the walls cream, it was time to address the problem of all-solids in our main floor.  
We bought these super sweet curtains at Target for just $20 a panel.  They are "Tan Henna", in case you are curious.  Since they are not lined, I simply attached them to the clips over the other brown curtains.  Perfect!  It gave the panels some more fullness AND the ability to darken better.  (The afternoon sun can be blinding through those doors!)

I made this sign.  SUPER easy, thanks to some directions on the Nate Berkus Show 
I simply bought a 6' length of 1"x6" select pine (I wanted a very flat piece of wood.)  

I painted it a dark gray (used up some extra paint from the office walls) in two coats.  Then I printed off the letters on my printer.  I lined up the letters on the board and traced them all, adjusting for better spacing when necessary.  When you trace the letters with a ballpoint pen, the wood becomes indented.  

After the tracing, I used some craft-store acrylic paint in sand-color to fill in the letters with a brush.  Next time I'll get a smaller brush, since it was tough in some areas, but that was my fault for being too impatient to wait to get a new brush.

The sand colored paint was a little gloppy in some areas and sparse in others, but I figured I was going to roughen it all up, so I wasn't concerned.  After the words dried, I pulled out a sanding block and roughed up the surfaces and corners and edges a bit.  Since I didn't paint two different colors, the sanding sometimes revealed bare wood.  So, I darkened the edges and the surfaces by rubbing the Distress Ink pad all over the sign lightly.  It picked up the corners easily and gave a bit of an aged look to the rest of the sign.  

After the Distress Ink dried, I sprayed the entire sign with a coat of acrylic sealer.  
Sorry I forgot to take step-by-step photos.  I was so giddy to get this sign done after we finally agreed on a phrase to go on it!

 Guess how I hung it up?


I put one on each top corner and one in the middle ... each with two nails to be a little more secure.  

To fill in the empty walls on other side...

I added a few frames.  I bought the frames at HomeGoods for $4 each... they were in the clearance area and were two different colors, but after repainting them and distressing them, they work!  Here are my girls.

And here are my boys.  

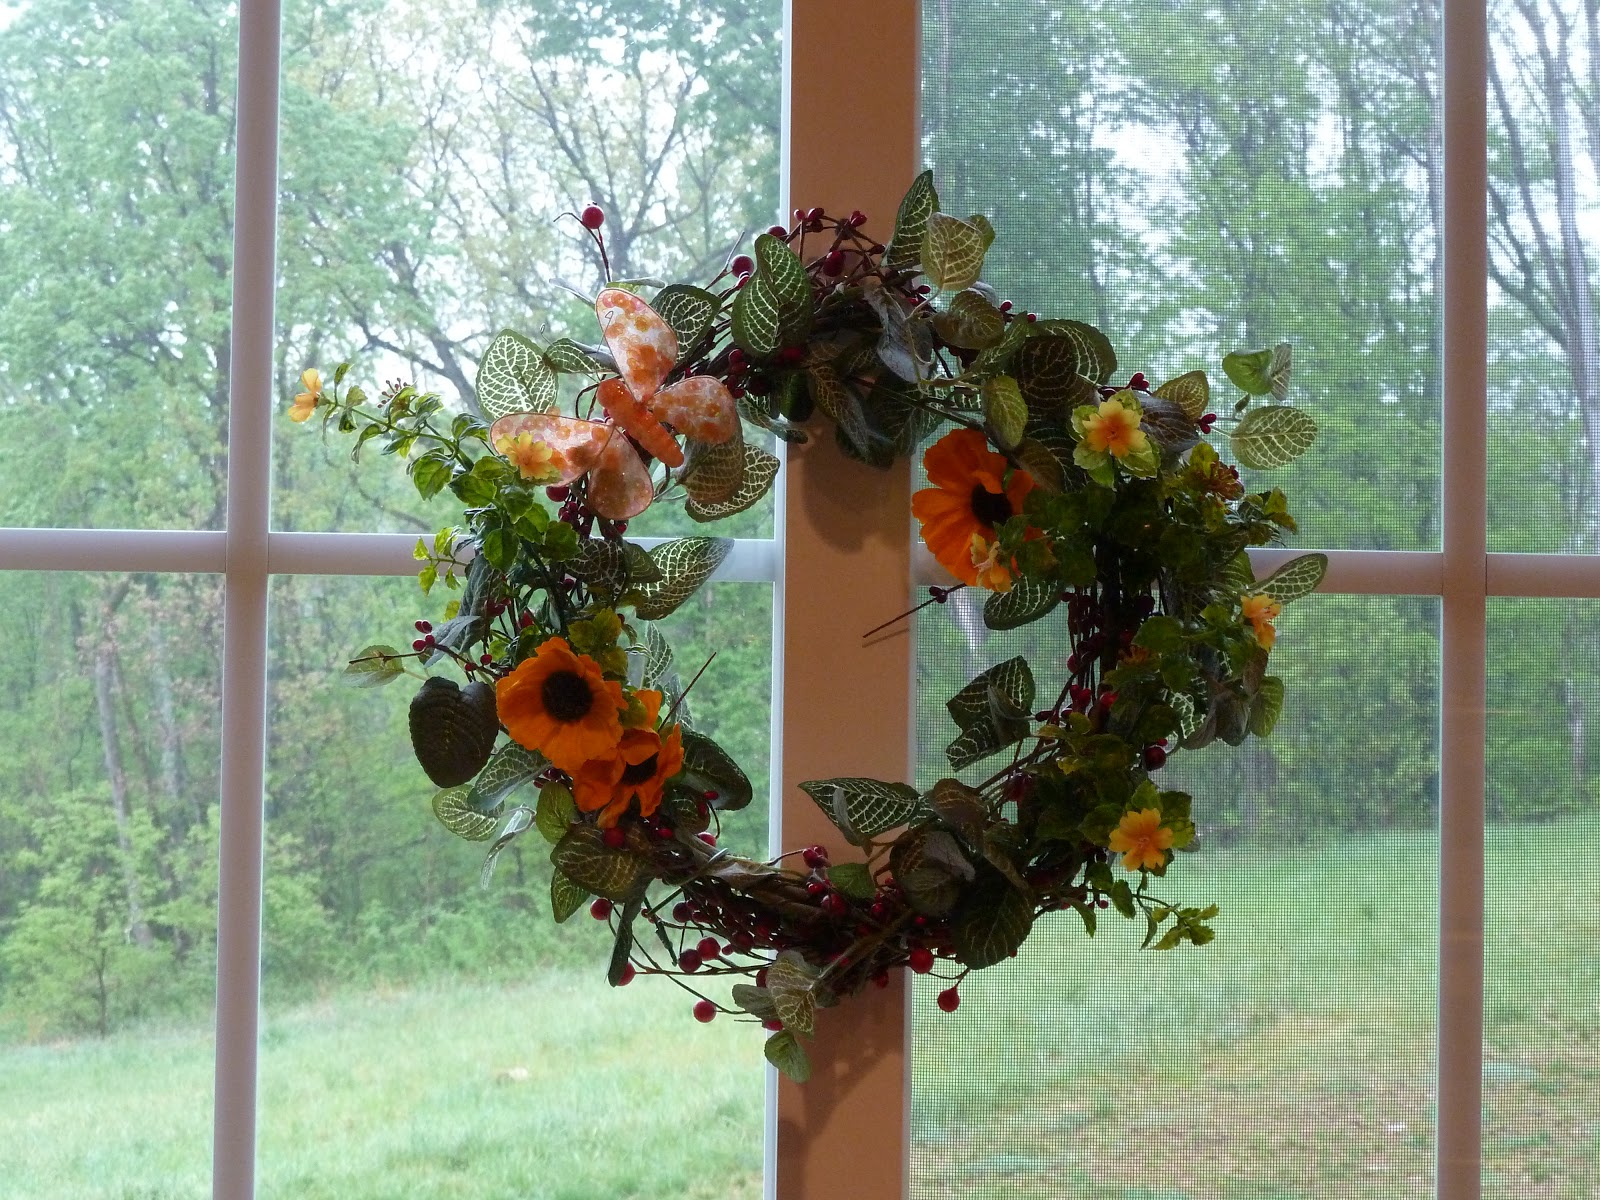
I had a simple red berry wreath on the doors, but I decided it wasn't very springy, so I added a few little doodads and leaves I got at Michaels yesterday.

I added another panel to my kitchen window, in order to match.  They didn't offer any other sizes and/or valances in this print, so we just bought another panel.

I inserted the tension rod, pinned the bottom part of the panel to the top with four safety pins, wrapped ribbon around the top and bottom and tied two pretty little bows.  Wah-lah... quick and easy valance from a full 84" panel!

Now that the room's walls are all prettied up with new wooden plaques and new dressed-up door, I think our breakfast room needs just one more thing....


Um... a table?


Thursday, April 5, 2012

My Ballard-Inspired Wood Plaques

I {heart} Ballard Designs catalog... and if I could actually afford their things, I'd probably decorate every single room with their styles.

Alas, I cannot... well, and still manage to feed my kids.

So, when I find something I REALLY like, I either wait for it to hit the outlet page, buy only the things under $30 (like my rubber doormat or small door rugs), or duplicate it myself.  

(Or just pout a little till the pain subsides.)

So, when I saw this....


I loved the idea of it.  Granted, they were the right size (about 8" square) and looked really cute... but I couldn't get over how much it looked like framed scrapbook paper.  I mean no disrespect toward the artist... they are beautiful.  But some scrapbook paper can look pretty doggone cool, too.

We recently (finally!) painted our kitchen walls.  Yes, I took a huge leap of faith and painted them "Water Chestnut".  Um, that means they went from white to cream.  :)  Here you can see that wildly daring color above the window.
Like my new Cricut words over the window?  We are big-time tea lovers here!  By the way, that red valance will be going soon.  Looking for more subtle colors.

Anyway, the walls were finally done, and we liked the simplicity of the Water Chesnut, but I needed to splash some color in the room.  Muted color, but color indeed.

So, I decided to make my own plaques... with my own choice of colors (and refused to pay $169 for the Ballard ones).

I bought a 6' length of 1"x8" pine board at Home Depot, and my dad cut it into squares (I think they were about 7.75" square when finished).  That gave me 9 squares.  


 Then I painted the squares' edges with some paint I had on hand.  I think it was the color of our family room.  :)  I painted a little on the face of each too, since I didn't expect the paper to be the exact size of each square.

Here, my daughter is beginning to Mod Podge the squares.  We coated each square with a thin, but complete coat of Mod Podge (not too thick).

Then we applied the cut paper we chose.  I was aiming for some simple patterns, but in the greens, rusts, and neutrals that we have throughout our main floor.


After they were all covered and dried (overnight), we applied one more coat of Mod Podge to the top.  I'm not great with this.  Somehow a few still ended up puckering and bubbling.  Ugh.  No worries... I worked with it.

Then I pulled out my "Distress Ink" ink pad and rubbed it along the edges and corners.  Then I lightly smoothed it over the surface of each square.  Guess what that did?  It highlighted those weird bubbles and puckers.  The cool thing is that instead of bringing attention to the puckered paper and showing "Here... look, she screwed up and made bubbles", the brown ink hid those bubbles under the distressing looks.


Here's a typical side-view.

Here are all of the plaques. (See in a few the brown lines?  Those are the ink-covered bubbles.)


I needed a way to hang them up... and didn't have any picture hardware on hand.  So, I turned to my daughter's huge jar of pop-tops.  

I nailed each one on by allowing about 1/16" on the side and top and nailing at the solid piece.

Here they are hanging on my kitchen wall.... now for a neat way to decorate that new table over the dog crate....

Up close....

And a side view.  Love the distressed look.

Super easy, and a great way to incorporate your favorite colors into a wall display.  I think I paid less than $16 for all of this (one-tenth of the Ballard price).  $12 for the wood (I got select pine, to make sure it was very straight.)  I had Mod Podge on hand, and the scrapbook paper was less than 50 cents apiece.